Not only can you make someone's day by sending them a handmade, pop-up greeting card, but you can also mail several out as birthday party invitations, or place them on the table to show where each guest will be seated. This also makes a great take-home memory of the party itself by adding the names of each guest to each card, and the date of the party.
Step 1
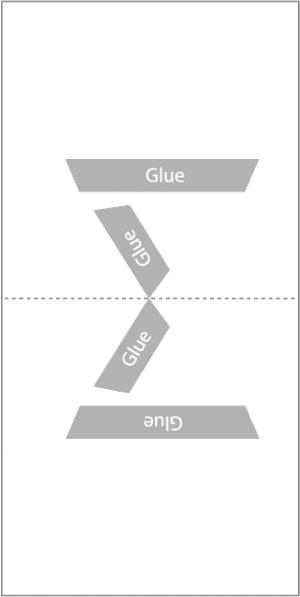 Click here to get the image. Print out the full size image on a heavyweight paper, like card stock or construction paper.
Step 2
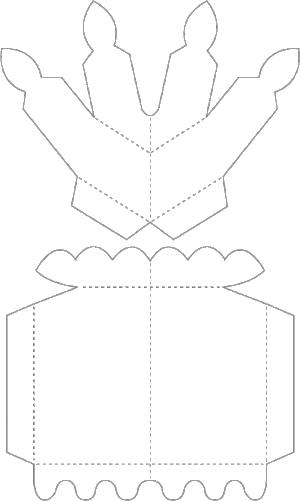 Click the image on the right to enlarge. Print out the pop-up pieces for the cake on another sheet of heavyweighted paper.
Step 3
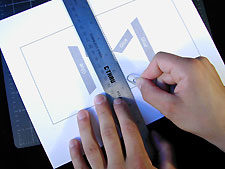 Press along the dotted line. Do this on the center of the card with the rounded end of a paper clip (or a ballpoint pen that has run out of ink). Use a ruler as a guide. Go all the way from the top to the bottom of the card.
Step 4
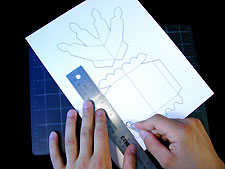 Repeat along the dotted lines of all the pop-up pieces.
Step 5
 Carefully cut out the cake's card. Follow the solid, black lines.
Step 6
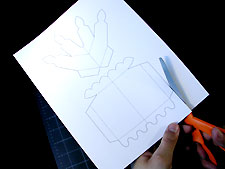 Slowly cut out the pop-up pieces. Follow the solid, black lines.
Step 7
Color in the candles. Do not color the cake yet.Step 8
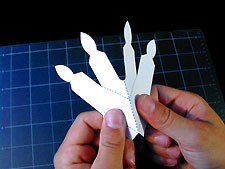 Fold the two sides of the candle piece. Fold away from you, along the center dotted line.
Step 9
 Lay the candles down flat and carefully fold the lower left tab up and crease. Return the tab to its original position.
Step 10
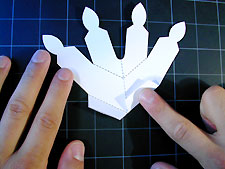 Carefully fold the lower right tab up and crease. Return tab to its original position.
Step 11
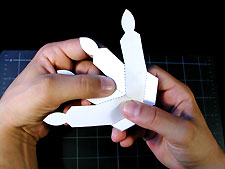 Pick up the candles. While holding the lower section still with your right hand, fold back the top section with your left.
 Step 12
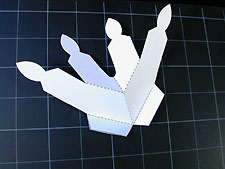 Notice that your candle piece should now look like this. The two candles in the center are pushed back away from you while the two candles on the ends are coming towards you.
Step 13
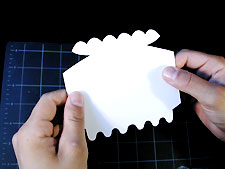 Turn the cake piece over. This is so that you do not see any of the black dotted lines.
Step 14
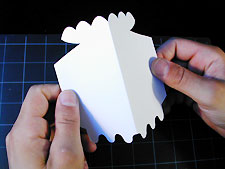 Fold the two sides away from you along the center, creased line.
Step 15
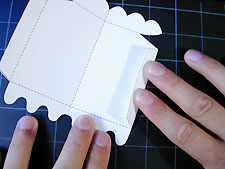 Turn the cake piece back over again so you can see the black, dotted lines. Lay the cake down flat and carefully fold the right tab up and crease. Leave the tab in this position.
Step 16
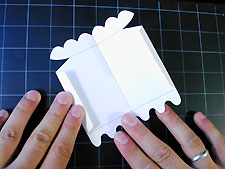 Carefully fold the left tab up and crease. Leave the tab in this position.
Step 17
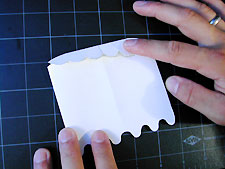 Fold down the "scalloped icing" tab at the top and crease. Leave the tab in this position.
Step 18
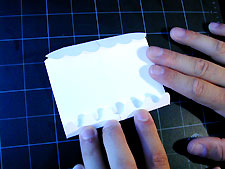 Carefully fold down the "wavy icing" tab at the bottom. Carefully fold it up and crease. Leave the tab in this position.
Step 19
Color in the cake and icing.Step 20
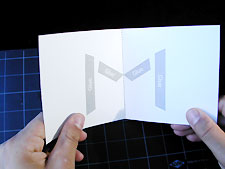 Fold the card in half along the center.
Step 21
 Apply white glue. Don't use too much glue or it will show. Apply it to the left angled area closest to the center of the card...
Step 22
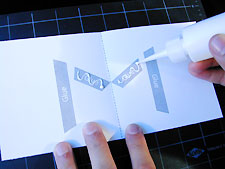 ...and to the right angled area closest to the center of the card.
Step 23
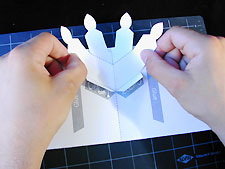 Carefully line up the tabs on the candles with the wet glue areas on the card. Press the candle's tabs into the glue. Make sure that the center dotted line on the candles matches the center dotted line on the card. Let the glue dry.
Step 24
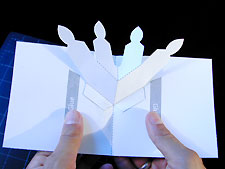 Wait until after the glue has dried and test the pop-up by slowly opening and closing the card. You may need to help the candles fold down for this first time.
Step 25
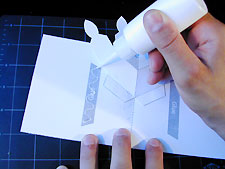 Apply glue to the remaining left glue area...
Step 26
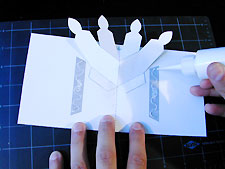 ...and to the right.
Step 27
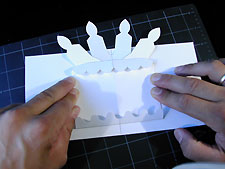 Line up the cake with the glue areas on the card. Press the sides into the glue. Make sure that the center crease line matches the center dotted line on the card. Let the glue dry.
Step 28
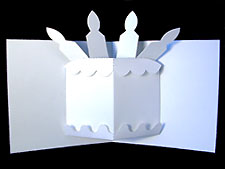 Admire your finished birthday cake pop-up card. And give it to your parents when its their birthdays! And your parents will love it!
Tips
- Color each card a differently flavored cake, and put guests' names on the cake itself.
- Print out the names of each of the friends attending, and add the date on the card.
- Take a small picture of the birthday child, and paste it to the outside of one of the sides of the cake, and another picture of the group of children who attended. This will give them a lifetime of memories about the party.
- The tips above are if you want to use this as an invitation card. You do not have to though. You may use it as a birthday card to give to someone if it is their birthday.


No comments:
Post a Comment