"The borrower is the slave of the lender."

Search

Custom Search

Tuesday, April 27, 2010

66 Things You Can Can Grow At Home: In Containers, Without a Garden

66 Things You Can Can Grow At Home: In Containers, Without a Garden : Planet Green - StumbleUpon


By Rachel Cernansky
Boulder, CO, USA | Mon Apr 26, 2010 12:55 PM ET

Growing your own food is exciting, not only because you get to see things grow from nothing into ready-to-eat fruits and veggies, but you also don't have to worry about the pesticides they might contain, and you definitely cut down on the miles theyand you—have to travel.
As it turns out, with pretty minimal effort, anyone can be a gardener. My boyfriend and I are essentially first-timers this season and so far have the beginnings of strawberries peeking out, tomatoes are on their way, the basil's about ready for a big batch of pesto, and once the last frost hits, the peppers, kale, spinach, chard, and mesclun will be on their way, too. All on a tiiiny little terrace (with the help of a little DIY carpentry).
If you're up to the challenge—and it really isn't much of one—growing your own food can be so rewarding. And so much cheaper! Just be sure to choose the right planter or container, learn how to maintain it properly, and go find yourself some seeds! (Or starter plants.)
Here's a starter list of all the crazy things even urban gardeners, without space for a garden, can grow at home.
apple tree in container photo
Photo credit: Gardener's Supply

Tree fruits - including apples


1. Apples can be grown in a container; you can also grow them on the balcony or other small space using a technique called espaliering.
2. Kumquats
3. Avocados (plenty of extra tips online if you search)
4. Blackberries
5. Blueberries (sometimes helpful videos are available online)
6. Pomegranate
7. Cherries
8. Figs
9. Pears

lemon tree photo
Photo credit: Photodisc/Thinkstock

Citrus fruits


Citrus trees in particular are said to be good for beginning gardeners and are easy to grow indoors, so don't let inexperience or lack of outdoor space stop you from enjoying fresh-picked, hyper-local fruit.
10. Dwarf oranges
11. Grapefruit
12. Tangerines
13. Meyer lemons
14. Limes

Tropical fruits


Tropical fruits can also be surprisingly easy to grow indoors, even in non-tropical climates. Such as...

15. Bananas (look for container gardening tips online)
16. Pineapple
17. Papaya
18. Guavas (several varieties)

hops plant
Photo credit: © iStockphoto.com/Thinkstock

The real surprises


19. Hops—yes, as in the "spice" ingredient in beer. Turns out they're easy to grow!
20. Aloe Vera
21. Strawberries
22. Tea (well, herbal tea)
23. Quinoa!

tomato plant
Photo credit: © iStockphoto.com/Thinkstock

The non-surprises


24. Tomatoes
25. Summer squash
26. Other squashes, like acorn and pumpkin
27. Hot Peppers
28. Sweet peppers
29. Cucumbers

Melons


30. Small cantaloupe
31. Jenny Lind melon (an heirloom cantaloupe)
32. Golden Midget Watermelon

herbs garden photo
Photo credit: Jupiterimages/Thinkstock

Herbs


Just about any herb grows well indoors—just be sure that if you're going to do any container-sharing, you do your research first about which herbs co-habitate well together. (Some will hog water, for example, and leave the others dried out.)

33. Basil
34. Oregano
35. Parsley
36. Rosemary
37. Chives
38. Catnip
39. Thyme
40. Sage
41. Parsley

kale container garden
Photo credit: Comstock Images/Thinkstock

Leafy Greens


42. Kale
43. Mesclun greens
44. Spinach
45. Swiss chard
46. Lettuces (plenty of options there, from micro-greens to head or loose-leaf)
47. Mustard greens
48. Collard greens
49. Arugula

Root Vegetables


50. Carrots
51. Beets
52. Potatoes

growing wheatgrass photo
Photo credit: Pixland/Thinkstock

Other healthy-sounding stuff


53. Sprouts
54. More sprouts: mung bean and lentil sprouts
55. Wheatgrass
56. Kohlrabi
57. Turnips
58. Rutabagas
59. Celeriac
60. Parsnips
61. Jerusalem Artichoke
62. Sugar snap peas
63. Rhubarb (not ideal in a container, but it can work)
64. Mushrooms (again, more tips online if you look)
65. Pole Beans
66. Aaaand... asparagus, although some disagree that it does well in a container. Try it if you're ok with a risk!

Bonus 67: You can grow your own loofah, too, but you'd need a garden rather than a container for that.
Related Posts:
Grow Your Veggies Upside-Down!
15 Creative Container Garden Ideas
Quick Tips for Getting Rid of Weeds
Top 35 Ways to Succeed at Organic Gardening


Sunday, April 25, 2010

Tips on How to Avoid Greenwashing

Tips on How to Avoid Greenwashing


On the 40th anniversary of Earth Day, it's important to address Greenwashing, or the act of falsely marketing a product as environmentally sustainable when the product or manufacturing process is in fact not eco-friendly.

Petie Davis from NSF , an independent, not-for-profit organization, that certifies products and writes standards for sustainable products, food, water and consumer goods, give us tip on how to avoid greenwashing.

Tips to Avoid Greenwashing

1. Look for meaningful claims. Be cautious of products making generic claims of "100% natural” or “environmentally friendly" with no backup.

2. Avoid products that make irrelevant claims, i.e. that a product is "CFC-free" (CFCs were banned more than 20 years ago).

3. Look for a seal or certification mark from a recognized, independent third-party specializing in green claims. Check with the certifier to verify the product is truly certified.

4. Check out the product’s packaging. While a product may be green, is the packaging green as well and can it be disposed of in an environmentally safe way?

5. Don’t be mislead by pretty pictures or use of earth-friendly colors on product labels. Just because a product label shows a forest doesn’t mean the product inside is green.

6. Look at the ingredient list on the product. A long list of ingredients or ingredient names that are difficult to pronounce may be harmful to you or the environment.

7. Avoid products where fragrances are a key ingredient.

8. Read product usage instructions and avoid those that display warnings on the label, such as “caution” or “use in well-ventilated area,” which typically indicate that the product is hazardous to you and/or the environment.

9. Question percentage claims, such as “this product contains 50% more recycled content.” Fifty percent more than what?

10. Be cautious of hidden trade-offs. For example, many products today are more energy efficient but may still be produced from hazardous or non-recyclable materials.


Friday, April 9, 2010

-Walt Whitman, from the poem "This Compost"

Image and video hosting by TinyPic

"Behold this compost! behold it well!
Perhaps every mite has once form'd part of a sick person-Yet behold!
The grass of spring covers the prairies,
The bean bursts noislessly through the mould in the garden,
The delicate spear of the onion pierces upward,
The apple-buds cluster together on the apple-branches,
The resurrection of the wheat appears with pale visage out of its graves,
The tinge awakes over the willow-tree and the mulberry-tree,
The he-birds carol mornings and evenings, while the she-birds sit on their nests,
The young of poultry break through the hatch'd eggs,
The new-born of animals appear-the calf is dropt from the cow, the colt from the mare,
Out of its little hill faithfully rise the potato's dark green leaves,
Out of its hill rises the yellow maize-stalk-the lilacs bloom in the door-yards,
The summer growth is innocent and disdainful above all those strata of sour dead."

-Walt Whitman, from the poem "This Compost"

Monday, April 5, 2010

Consumer Culture is no accident

Eartheasy Blog » Consumer Culture is no accident

I don't know about you but I'm pretty fed up with Big Corporations.  I plan on giving them as little of my money as possible.  I buy 'used' when I can. I make as many of my own products as possible. I use Freecycle:   http://www.freecycle.org/  if I have to buy something I now pay with CASH.   I've found that  I have an intense dislike  of losing sleep at night because I'm worrying about making that credit card payment, you know, the credit cards that now have an absurdly high APR?  Yeah, those credit card.  And worse...paying for an item that I bought a year ago,  that I really didn't need,  an item that made me happy for about five minutes.  I have stuff I don't need &  stuff I no longer want.  I'm no more happier with that stuff than I was without that stuff.. yet I am poorer because of it in addition to helping Big Corporation do violence to the planet,  exploit their employees, for example,  low wages, few benefits.  I have no desire to keep up with 'The Jone's'. I don't want to be enslaved by debt.   I like to sleep at night,  I want the freedom that comes with having small debt  and a clear conscious. All this consumerism is killing everything that I love...nature, wildlife, trees.....

Consumer Culture is no accident

“The American economy’s ultimate purpose is to produce more consumer goods”. What kind of society does this create?

By David Suzuki Posted Mar 25, 2009
Consumerism
Most people I talk to today understand that humanity is inflicting harsh damage on the planet’s life support systems of clean air, water, soil, and biodiversity.
But they feel so insignificant among 6.2 billion people that whatever they do to lighten our impact on nature seems trivial. I am often asked, “What can I do?”
Well, how about examining our consumption habits. Not long ago, frugality was a virtue. But today two-thirds of our economy is built on consumption. This didn’t happen by accident.
The stock market collapse in 1929 triggered the Great Depression that engulfed the world in terrible suffering. World War II was the catalyst for economic recovery. America’s enormous resource base, productivity, energy, and technology were thrown into the war effort, and soon its economy blazed white hot. With victory imminent, the president’s council of economic advisors was challenged to find a way to convert a war economy to peace.
Shortly after the end of the war, retailing analyst Victor Lebow expressed the solution: “Our enormously productive economy … demands that we make consumption our way of life, that we convert the buying and use of goods into rituals, that we seek our spiritual satisfaction, our ego satisfaction, in consumption…. we need things consumed, burned up, replaced, and discarded at an ever-accelerating rate.”
President Eisenhower’s council of economic advisers chairman stated: “The American economy’s ultimate purpose is to produce more consumer goods.” Not better health care, education, housing, transportation, or recreation or less poverty and hunger, but providing more stuff to consumers.
When goods are well-made and durable, eventually markets are saturated. An endless market is created by introducing rapid obsolescence (think clothing, cars, laptop computers). And with disposability, where an article is used once and thrown away, the market will never be saturated.
Consumer goods aren’t created by the economy out of nothing. They come from the Earth, and when they are used up, they will be returned to the Earth as garbage and toxic waste. It takes energy to extract, process, manufacture, and transport products, while air, water, and soil are often polluted at many points in the life cycle of the product. In other words, what we consume has direct effects on nature.
And then there are social and spiritual costs. Allen Kanner and Mary Gomes write in The All-Consuming Self: “The purchase of a new product, especially a ‘big ticket’ item such as a car or computer, typically produces an immediate surge of pleasure and achievement and often confers status and recognition upon the owner. Yet as the novelty wears off, the emptiness threatens to return. The standard consumer solution is to focus on the next promising purchase.”
Ultimately, it goes beyond pleasure or status; acquiring stuff becomes an unquenchable demand. Paul Wachtel writes in The Poverty of Affluence: “Having more and newer things each year has become not just something we want but something we need. The idea of more, ever-increasing wealth, has become the center of our identity and our security, and we are caught up by it as the addict is by his drugs.”
Much of what we purchase is not essential for our survival or even basic human comfort but is based on impulse, novelty, a momentary desire. And there is a hidden price that we, nature, and future generations will pay for it too.
When consumption becomes the very reason economies exist, we never ask “how much is enough?”, “why do we need all this stuff?”, and “are we any happier?” Our personal consumer choices have ecological, social, and spiritual consequences. It is time to re-examine some of our deeply held notions that underlie our lifestyles.


Sunday, April 4, 2010

How To Make Deoderant

Ultimate Money Blog- Save Green and Live Green!


Store bought deodorant contains many ingredients and fragrances. Also, there’s a lot of controversy about aluminum in deodorant being linked to breast cancer. I like to err on the side of caution. I figure it can’t hurt to use homemade deodorant.
Also, your body is meant to sweat to release toxins, so antiperspirants really aren’t that great.  Just use a little deodorant and you’ll be smelling like roses all day!

Ingredients

-6 Tablespoons of Coconut Oil
-1/4 cup Baking Soda
-1/3 cup Cornstarch
-1/4 teaspoon shea butter or cocoa butter
-10 drops of your favorite essential oil

Directions

Heat the coconut oil until you can stir in the shea butter or cocoa butter. Once these are incorporated, add in the dry ingredients and the essential oils. I like to use lavender essential oil because it smells so good! You could also use lemon, sweet orange, or patchouli. Use whatever you like! That’s the fun of making your own deodorant.
When the mixture cools, you can put your homemade deodorant in an old deodorant container or in a tub and just scoop some out with your fingertips.

You may have to store the deodorant in the fridge in the summer, because the coconut oil may liquefy.

Another Homemade Tooth Paste Recipe

Make Your Own Toothpaste | Ultimate Money Blog- Save Green and Live Green!

In a quest to green our lives and save more money, I have decided that when we run out of many of our personal hygiene products, I’m going to try my hardest to make the replacements myself. Here are the recipes I’ve concocted so far. When we ran out of toothpaste last week, I knew that I would be creating some of my own toothpaste. I have a couple recipes that I’ve been using, but Mr. Money wanted something more like commercial toothpaste, so the search was on. Enter this super simple toothpaste recipe.

Ingredients

-4 T. Baking Soda
-4 T. Vegetable Glycerin (I got mine at the grocery store in the pharmacy area, but you can get it from Amazon if you can’t find it locally.
-2/3 t. Salt (I used pink Himalayan sea salt)
-30 drops of Peppermint Essential oil (I got mine locally, but it’s on Amazon too)
-Container (I use an old toothpaste tube that I cut the end off)
-Toothpaste Tube Squeezer (Optional- keeps the toothpaste in the tube!)

Instructions


Mix baking soda, glycerin, and salt in a bowl. Add in 30 drops of peppermint essential oils and stir. It should be the consistency of real toothpaste. You can add more or less glycerin if preferred.

Put it in a container or reuse a toothpaste tube, and use it to brush brush brush your teeth!

Pack A Salad In a Mason Jar

Mish Mash: What IS in Mish's Mason Jar????????


Picnic Corn Salad
3 cups frozen corn kernels, thawed
2 cups grape tomatoes, halved
2 stalks celery, chopped
1/3 cup chopped red onion
1/3 cup chopped green pepper
1/4 cup olive oil
2 tablespoons balsamic vinegar
1/4 teaspoon salt
1/4 teaspoon cracked black pepper
4 cups bagged lettuce, assorted kinds

Combine first 4 ingredients in a large bowl; toss gently. Combine oil and next 3 ingredients, stirring with a whisk. Drizzle over corn mixture; stir gently. Add lettuce, toss gently to coat. This is a delicious portable side salad; mound lettuce on top of the dressed salad; then toss just before serving to keep the salad crisp. For salad in a jar, layer corn salad into pint jars, top with lettuce. Invert on plate to serve. I usually double the dressing to have extra to pour on top.


Now I'm Hungry.................


50 Great Uses For Mason Jars

50 Great Uses for Mason Jars | Care2 Healthy & Green Living
I love Mason jars , I love the way the look, the way they feel.  I collect them......okay, okay so I'm a bit eccentric. Any way, I did a web search for ways to use Mason Jars to justify my obsession.  Here what I found.

Shalom,
Patty


Mason jars are amazingly versatile, even if you never use one to hold preserved garden produce.
Some mason jars can even be used in the freezer (these are usually marked “freezer jars” or freezer safe). When used in the pantry, the jars allow you to store foods safely. Living in an old house on acreage means that we are blessed with an abundance of mice if food is not stored carefully. The glass jars are impervious to chewing and gnawing and they don’t allow foods to absorb odors from other foods. You can store onions and confectioner’s sugar next to each other without the sugar taking on an onion flavor.
Uses for Mason Jars
1. Canning foods for storage
2. Storing dried foods
3. Storing sugar, flour, and oatmeal
4. Storing cookies
5. Storing bulk foods
6. Storing homemade mixes
7. Recipe in a jar gifts
8. Making and storing homemade vinegar
9. Making vanilla extract
10. Storing leftovers in the refrigerator
11. Use as measuring device
12. Store saved seeds
13. Grow sprouts
14. Drinking glass
15. Hold homemade soy candles
16. Holding sour dough starters
17. Storing fresh milk if you milk your own goats or cows
18. Storing your clearly marked cleaners
19. Cotton balls
20. Bulk or homemade shampoo
21. Bath salts
22. Holding Legos and other small toys
23. Storing small office supplies
24. Bolt the lids (with screw tops) to the underside of a shelf and use to hold screws, nails, and washers
25. Hold balls of yarn while knitting or crocheting…drill a hole through the lid and thread the yarn through. Make sure it is smooth so it doesn’t cut the fiber. Keeps your yarn from rolling off.
26. Make a solar light
27. Make sun tea
28. Use them to hold fresh flowers
29. Reusable holders for candy gifts
30. Portable Garden Cloche
31. Store sewing notions
32. (Mostly) Homemade soap dispenser
34. Bug jars for the kids
35. Keeping change
36. Make a terrarium
37. Catch those pesky flies
38. Here is an easier version of the homemade fly trap. Just put equal amounts of sugar, vinegar, and water in a quart Mason jar. Punch holes in the lid that are large enough for flies to get through.
39. Sewing kit in a jar
40. I love these individual silverware and napkin holders
41. Poultry feeder
42. Mason jar photo frames
43. Potpourri jars
44. Snow globes
45. Add nonflammable material and nestle a candle in it to use as a centerpiece. I used cranberries to hold votive candles in pint jars last Christmas and they were fantastic.
46. Meditation jar - print out your favorite quotes, thoughts, or scripture verses and cut them in strips. Keep them in the jar and remove one a day to contemplate. You can use this for affirmations, journal prompts, or anything similar.
47. Holding scrapbooking and craft supplies
48. Pencil and pen holder
49. Hold shells and other collections for display
50. Cakes in a jar
Where to Find Mason Jars
You can buy Mason jars in almost any store but there are other ways to get them that are less expensive. Many times you can advertise on Craigslist that you are looking for canning jars and someone who is no longer canning will offer them to you. Other ways to acquire them are:
  • Check with relatives
  • eBay
  • Garage sales
  • Thrift shops
  • Classified ads
Always check them for cracks and chips. If the rims have chips or cracks they can not be used for canning. How else do you use mason jars? Please share below.


Easy Sew Fabric Produce Bags

Wisdom of the Moon: Cheap & Easy Fabric Produce Bags

Cheap & Easy Fabric Produce Bags

I've been using my set of fabric grocery bags since I made them this summer, but I still kept using the plastic bags from the store for fruits and vegetables. Every time I pulled one off the roll, I thought, "I have got to make some of these." And then by the time I get home, I'd forget.

I finally made 9 of them this weekend. And they cost me exactly nothing because I reused a sheer curtain that we'd replaced.

2008 01 19 010

You can either use tulle or sheer fabric, but really I think the sheer is much easier to work with. The only requirement is that they be see through and lightweight. Sometimes they have sheer curtains at the thrift store, just take em home and wash well in hot water. If you can't find those, tulle is probably going to be cheaper. You can get 4 bags out of one yard, which costs 2 bucks.

Also, if you want them to be painfully cute, you can decorate them with some handmade stamps. I carved up some broccoli and onions special for this project.
P8130064

So, on to the directions.

-First, cut the fabric into rectangles that are 17" by 27", which makes a finished bag 15" tall by 13" wide (with double hemming). You can easily make them bigger or smaller, though. (If any of the edges are excessively frayed, cut that off first before cutting to size.)

-Then you need to hem any sides that are not on the selvedge (finished edge) to keep the whole thing from unraveling over time. You can do it one of two ways, both shown in the picture below. If you need a better explanation of the double hem, check here. If you use the tulle, don't bother with the hemming, just sew the whole thing with a fairly tight, straight stitch. (Note- I've changed this from the original recommendation of a zigzag because straight stitches work much better on tulle. Sorry, August!)
2008 01 19 002 copy

-Next fold in half hamburger-wise (as opposed to hotdog-wise... does anyone else remember this brilliant instruction from elementary school?) and pin. In the picture below, the right side is the bottom of the bag and the left is the top.
2008 01 19 011

-When you sew the side and bottom, start sewing about an inch down from the corner. Also, it's best to sew where the fabric is doubled up on itself, basically somewhere along the hem.
2008 01 19 003 copy

-Once you've sewn the bag, make the channel for the twine by folding down and pinning the top edge like shown.
2008 01 19 004

-Start sewing where shown in the picture, folding the fabric evenly down as you go.
2008 01 19 005

-By the time you've gone all around the top and returned to where you started, you'll have created a channel like this. The openings to the channel are underneath my right finger and thumb (please excuse the paint on my hands, we've been painting Randa's room this week.)
2008 01 19 006

-All you need to do to finish the bag is to tie a knot in some twine, push a safety pin through it and feed it through the channel. Leave about 2 or 3 inches hanging out on each side and tie it in a knot. When you want to close up the bag, just do a slip knot.

Oh, and one more thing. I weighed one bag on the kitchen scale and it's total weight was 0.4 ounces (as compared to the plastic bag which was 0.1 ounces).

That's it.


The Cosmetic Data Base ~

Browse Products || Skin Deep: Cosmetic Safety Reviews   

VISIT THE WEBSITE, YOU'LL BE BOTH SURPRISED & DISGUSTED AT WHAT AN UNREGULATED MARKET MEANS TO HEALTH & SAFETY. THE COSMETIC DATABASE

Browse MAKEUP

product types

score  key --  0-2: low hazard | 3-6: moderate hazard | 7-10: high hazard

blushbody artbronzer/highlighter
brow linerconcealereye liner
eye shadowfacial powderfoundation
glitterlip glosslip liner
lip plumperlipstickmascara
other eye makeup                            


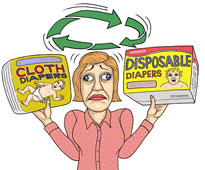
Cloth Diapes vs. Disposable Diapers

Are cloth diapers that much greener than disposables? - By Brendan I. Koerner - Slate Magazine

Should My Baby Wear Huggies?Going diaper shopping for the Little Green Penlight.

In March, the Green Lantern wondered: Are cloth diapers really better for the environment than disposables? The piece is reprinted below.

Illustration by Mark Alan Stamaty. Click image to expand.I'm about to have my first child, and my husband and I are vigorously debating our diaper options. Old-fashioned cloth nappies seem like a greener choice than plasticky disposables, but I've heard this isn't necessarily the case—washing machines don't run on pixie dust, after all. Can we put Huggies on the tyke without feeling too guilty, or is cloth the clear environmental winner?...................Finish The article here:  http://www.slate.com/id/2187278/


How To Recycle Everything

How to Recycle...Everything | Care2 Healthy & Green Living

By Darragh Worland, Tonic

Have you ever found yourself about to chuck a bunch of packing material after a big move or bringing home that new flat screen TV only to wonder if maybe you could recycle all those peanuts instead? If only you knew where to take them!Well, now you can find out in a hot minute. Earth911 has a toll-free hotline and website with an exhaustive directory of recycling and disposal centers near you. Now, while many municipalities have curbside recycling programs, we all know there are plenty of products that you can’t just pack up in a clear plastic bag and leave at the curb.

Recycling things like batteries, cell phones, gift cards, computers, game consoles, plastic bags, plastic bottle caps and those packing peanuts takes a little more forethought, but it can and should be done, whenever possible.

Earth911 started as a toll-free hotline and directory of recycling listings in 1991, but has since evolved into a website with all kinds of information on recycling, including daily news, feature stories and more.

But rather than ditch the phone system in favor of the website, Earth911 has recently upgraded its hotline to speed and simplify the process of accessing information. Now users can get location-specific information in a jiffy, without being tethered to the Internet. Earth911 also says the phone system is easier to navigate and even bilingual, so now Spanish-speaking Americans can use it, too.

You may recognize the hotline number: 1-800 CLEANUP is featured on hundreds of millions of products nationwide. Companies use it to direct their consumers to recycling and disposal options for hundreds of different items, including potentially toxic substances like paint and motor oil.

With spring cleaning on your to-do list there’s no time like the present to sort through that box of “to-be-recycled-some-day” items.

Tonic is a digital media company dedicated to promoting the good that happens around the world each day. We share the stories of people and organizations that are making a difference by inspiring good in themselves and others.

At Tonic, we also see ourselves as a service company — one that strives not only to inspire our readers, but to equip them with the resources to make a difference.

More on Green 101 (113 articles available)


Ways To Get Calcium Without Cow's Milk

Get Calcium Without Relying on Cow's Milk | Care2 Healthy & Green Living

Calcium-Rich, Non-Dairy Foods

1. Fortified beverages like O.J and soymilk. A six oz. serving of calcium fortified orange juice can provide as much as 20-25 percent of your daily value (DV). An eight oz. cup of soymilk can contain as much as 50 percent of your DV. Make sure to check the labels as different brands can vary in their nutritional content!

My tasty tip: Avoid the brands with added sugars. I always opt for unsweetened soymilk to shave out the hidden calories!

2. Steamed or sautéed greens. Turnip greens, kale and spinach pack the greatest calcium punch. Try not to overcook to avoid losing the nutrients.

My tasty tip: Spice it up with some minced garlic. Garlic is loaded with anti-oxidants and anti-viral properties.

3. Salmon — canned, that is. Wild caught salmon is great for all of its omegas but three ounces of canned salmon locks in 18 percent of your DV of calcium. The trick? Eating the bones. The canning process softens them up making them more edible and palatable.

My tasty tip: Look for brands championing wild, sustainable harvesting. Enjoy the salmon perched atop wholesome crackers with mustard and avocado or atop a salad of organic mixed greens and local raw veggies.

4. Raw broccoli. A half-cup serves up two percent of your DV.

My tasty tip: Dress it up or dip in an organic dressing like vegan tahini and lemon-based Annie’s Naturals Goddess dressing.

5. Tofu. It contains 20 percent of your DV! The versatile meat substitute can be prepared to sate any taste preference.

My tasty tip: Try to seek out the least processed, preservative containing variety.

::Dr. Weil


Saturday, April 3, 2010

Make Your Own Cloth Baby Wipes


Buying disposable wipes can be expensive, have unsafe chemicals and is bad for the environment.  Making your own cloth wipes cheep or free is this easy. Use old flannel receiving blankets, old cotton t-shirts, flannel sheets/pillow cases. Just moisten them with plain water or a homemade wipe solution before use.

 If you use a thicker fabric you can make one-layer wipes. You can use thinner fabrics for two-layer wipes.   


Next you need to decide what size to make your wipes. You can make them any size you want, but traditionally, they are either 8×8 or 4×8. The smaller wipes fit in commercial wipes containers easily, and the larger wipes fit when folded in half.

Easy Homemade Wipes - One-layer wipes

Cut your fabric into squares or rectangles in the size you selected. You can leave the corners square or use a quarter to help round them.

Zig-zag or serge all the way around the edge.

Trim the threads and you̢۪re done! Congrats! You made a cloth diaper wipe!

Tip: Use different thread colors or variegated thread for a more decorative look.


Moderately Easy Homemade Wipes - Two-layer wipes

Cut your fabric into squares or rectangles in the size you selected. You can leave the corners square or use a quarter to help round them.

Put layers together with "right" sides facing out on each side.

Line up the edges of the layers and pin all the way around the wipe.

Zig-zag or serge all the way around the edge

Trim the thread and your done!

Now that your a pro, get busy and completely replace disposable wipes forever!


How to Sew a Fitted Cloth diaper

I ran into this today and thought I'd share it.  My babies are 28 & 31.........'and no'........no grandchildren yet but that doesn't mean I can't start preparing ;)

 Instructions on sewing a fitted cloth diaper. It's so easy!! Learn how to here

Aren't you tired of paying an arm and a leg for some nice diapers? I was too, and with a few tips from people, figured out how to sew my own.

I have a basic sewing machine. It cost like $130 when it was new. You just need straight stitches and zigzag stitches for this.

Fabric:
Any cotton fabric will work. You can use old clothing, old flannel sheets, old towels, old receiving blankets, if you want "free" fabric.  Any flannel will do, there's quilter's flannel, diaper flannel, and "cuddly" flannel.


You'll need thread, sew-on velcro (1.5" preferably), and elastic (3/8").

Whenever you stitch, make sure to back-stitch at the beginning and at the end of your stitching. (That means, stitch forward, then backwards, then forward again). This will prevent your stitches from coming undone.

Step 1:
First, get your pattern. I traced a diaper I already had, and altered it some. It's not hard, just get the general shape, and with subsequent diapers, you can lengthen or shorten whatever doesn't seem to fit right.

If you're making your own pattern, I suggest tracing half the diaper, then folding the pattern in half to get the rest so the diaper is identical on either side.


Step 2:
Cut 2 pieces of your good fabric. This is flannel I bought at Walmart for $2.50/yard.


Step 3:
Cut 1 or 2 pieces of your inside fabric, using the same pattern. This particular fabric is a cotton knit (kind of like t-shirt material), I like to use 2 inner pieces for a thicker diaper, but you can use only 1 if you prefer.


Step 4:
Get your soaker pad. You can use fabric scraps (like the one on the right), or a washcloth, part of a terry towel, etc. I like the soaker to be about the length of a washcloth.  It's the same size as a washcloth. If I was using it, I would fold it in thirds, and stitch around it to hold it in place.  The microfiber towels hold a LOT of liquid, and with one of those as a pad, the diaper will easily go all night.

This time, I'm using the fabric scraps. They don't all quite fit evenly in the rectangle, but that's ok. I stitched a straight stitch all the way around it, and evened out the edges with a scissors.


Step 5:
Sew the soaker pad to one of the center pieces. Make sure it's in the very center of the diaper. I did a zig zag stitch at the very edges of the soaker pad, all the way around it.


Step 6:
Pin all 4 layers together. You want the outer fabric's right sides facing each other, at the very center. You notice I've got the black checks facing outwards, so that the whiter side is towards the outer layers. This is so the black checks don't show through to the outside of the diaper.

So at the very bottom, there's the black check fabric, black checks facing downwards. On top of it, there's the blue fabric, right side facing upwards. On top of that one, there's another blue fabric, right side facing downwards. On top of that one, there's the one you see, which has the black checks facing upwards.

Make sure to get all the edges as even as you can with each other when you pin it together.


Step 7:
Sew a straight stitch all the way around the diaper, leaving the front part (that's towards the bottom in the picture) open. Cut with a scissors all the way around where you've stitched, fairly close to the hem. Make sure not to cut too close that you cut your stitching!! Clip (cut towards your seam WITHOUT nicking it) around the curves a little bit.


Step 8:
Fold the diaper lengthwise in half, and mark where you want your elastic to go. I used a pink highlighter, use whatever works. You fold it in half to do it so the elastic is evenly spaced. I usually do it an inch or two away from the end. Do the same thing for the leg elastic. Start near the tab and end near the front somewhere. (it doesn't matter that much where it goes, just make both sides even).


Step 9:
Take the elastic and hold or pin it where your first mark is. You'll want to sew it along the seam, in line with the straight stitch that's on there. With the sewing machine, you'll use a very small straight stitch, going forwards and backwards over and over a few times to tack it down. Then switch the machine to a large zig zag stitch, without taking the diaper off the machine. While stretching the elastic with one hand, and pulling the diaper through the machine with the other, zig zag the elastic down to where the 2nd mark is. Tack down that end of the elastic, then cut it off. Do the same thing with both legs, along with the back.


This is what it'll look like with the back done:


This is what it'll look like with the back and the leg elastics done:


Step 10:
Turn the diaper right side out. It'll look like this, then:


Step 11:
Fold the front flap in, and pin it shut.


Step 12:
Sew closely to the edge of the front, to securely close the gap.


Step 13:
This step is optional (I've made a few diapers without it), but it makes for a really nice finish to it, and keeps everything inside better. This creates a kind of "cuff" at the waist, and legs.

You can iron the seams, so they stay open better, or pull them out all the way and pin along them. You'll pull the elastic to stretch it, and pin along side it (not on it).

While stretching the elastic, sew a straight stitch next to it (where you pinned), keeping the seam as flat as you can.


This is what the waist will look like after you do that:


This is what it will look like after you do the waist and legs:


Step 14:
Time for the velcro! Pin a length of the loop part to the front, exterior of the diaper.


Step 15:
Sew a zig zag stitch all the way around the velcro to secure it. For the tabs, cut a piece of hook, and zig zag it all the way around. It's best to place it as close to the end of the tab as you can. This is what it will look like with all the velcro on it.


And this is what it'll look like, completed, and closed. That was easy, wasn't it?