"The borrower is the slave of the lender."

Search

Custom Search

Wednesday, March 31, 2010

Spending Money: 25 Tricks You Need To Know

The Psychology of Spending Money: 25 Tricks You Need to Know - Career Overview

March 30th, 2010

Money is a practical part of our lives, but that doesn’t mean it’s easy to understand. From investing to fighting the temptation to shop, money and spending are actually pretty subjective concepts that can either ruin our lives or help us develop stable futures for ourselves. In short, it’s all about how you view it. Here are 25 tricks for understanding the psychology of spending money and maximizing your ability to be in control.
General
These general tricks will keep your attitude towards money balanced and realistic.
  1. Beware of sales: Just because something is discounted doesn’t mean you should buy it. Decide whether or not you would have bought it if it wasn’t on sale, and then think of the discount as a bonus if you really believe you need it.
  2. Spend below your means: To spend below your means, you’ll need to eliminate debt, come up with a realistic budget, and put a reasonable percentage of your income into savings.
  3. Don’t buy what you can make yourself: Make your own lunches, coffee, and even clothes or home goods if you know how to sew. You’re just wasting your money if you can make something just as good or better yourself.
  4. Live one raise behind: Instead of adjusting your lifestyle to accommodate your new raise, continue living and spending as you were before, and put the extra into savings.
  5. Buy what you need, not what you want: Think about spending as exchanging money for things and services that you need, not just buying extra things that you want. Make a list of your needs vs. wants for the month, and then go back and edit it until you’re being truly honest.
Cash
Learn how to use cash so that you’re better organized and less willing to part with your money.
  1. Pay in full: For larger purchases, like a new TV, couch or even a used car, save up so that you can pay in full and avoid interest rates. You’ll also know that you can afford to pay, even despite any unforeseen circumstances that could make you late or short on payments in the future.
  2. Use cash, not plastic: It’s harder to part with physical cash than to swipe a debit card. Withdraw a certain amount every two weeks, and limit yourself to spending just that amount.
  3. Save your change: Every few days, empty all the loose change and dollar bills you have in your wallet. You’ll be surprised how much money you’ll save up in a month.
  4. Separate your cash into envelopes: Put your cash into non-bills categories for groceries, entertainment, gas and miscellaneous necessities. Only spend what’s inside.
  5. Be smart about ATMs: Decide beforehand which ATM you’re going to use to avoid extra banking fees, and how much you plan on taking out. You want to take out enough so that you don’t have to keep going back (and keep paying fees), but you don’t want to over-withdraw, which can leave to overspending.
Credit
These tricks address the dos and don’ts of using credit cards.
  1. Don’t use credit for everyday expenses: If you want to use a credit card, it should for emergencies or to improve your credit score. Using credit for everyday purchases makes it easier for you to turn to your credit card whenever it’s convenient. This bad habit also increases your chances of accruing unnecessary debt.
  2. Take responsibility for your own actions: Psychologists believe that people with internal locus of control are more responsible and accountable for their own actions rather than relying on luck, and accrue less debt.
  3. Learn how to prefer future benefits rather than immediate gratification: One of the easiest ways to fall into the debt trap is to believe that you must have things now. Train your mind and your lifestyle expectations to appreciate the benefits of saving up for something and rewarding yourself in the future instead.
  4. Understand the true horror of a life in debt: Sometimes, understanding how the purchases you make now — just because you feel like buying them — can actually ruin your life is enough to stop you from spending.
  5. Never use credit when you have cash: If you have the cash to pay for something, use that, not your credit card. This strategy will help you live within your means.
Budgeting and Saving
Here you will learn how to budget, track your money and save by changing the way you think about money.
  1. Make 30-day lists: When you spot something you really want to buy, like a new pair of shoes, put it on a 30-day list. If you still want it in 30 days, buy it.
  2. Don’t be afraid to talk about money: Being honest about how much money you have in the bank and how long it will take to save a certain amount is stressful and unpleasant, but necessary. If you keep putting it off, you’ll never make any progress.
  3. Set up automatic savings plans: If you don’t think you’re strong enough to transfer money into savings, set up an automatic plan with the bank or your employer.
  4. Keep making payments, even when the item is paid off: If you’re used to living on a budget that accommodates a $300 car payment, keep putting that $300 aside even when the car is paid off.
  5. Calculate how your spending adds up: $3.50 for a cup of coffee doesn’t sound like much, but when you figure out how much it will cost you in a year, you’ll be more likely to stick that in savings instead.
Attitude
Rework your attitude so that you have a healthy relationship with your money.
  1. Don’t associate your quality of life with how many things you have: Make a point to gauge your happiness with non-material things and concepts, people and activities that can’t be bought.
  2. Find free, or cheaper, entertainment: Start staying in one extra night per week. Find free — or at least cheaper — entertainment that you can still look forward to as a treat.
  3. Live for yourself, not other people: Don’t worry about keeping up with other people’s spending habits or lifestyles. Live according to what you need and what makes you happy.
  4. Be honest with what you really deserve: Just because you’ve had a rough day doesn’t mean you "deserve" a new dress. You may deserve a nap, but don’t inflate your idea of entitlement or reward based on your mood.
  5. Don’t associate money with evil or negative connotations: Money is serious, but you shouldn’t be afraid of it. Once you realize that you have control over how you spend, invest and save, you’ll have a more balance and productive relationship with money that isn’t based on fear or entitlement.


Saturday, March 27, 2010

Mulching (Composting Toilets)

Living Outside the Box - links

Simple Appropriate Technologies

A Few Simple Technologies for Daily Living

This website highlights our on-going exploration of some practical aspects of simple, land-integrated living. The emphasis is on simple technologies and skills that address basic needs such as food, water, shelter, etc.
You will find examples from our years in South Texas, and also from Arizona and Oregon, where we currently split our time.
If you have questions or comments, we'd enjoy hearing from you.
Email us at: david@omick.com

History
Other Biological Toilets           
Other Graywater Systems                   
Gardening
         Food Preservation and Storage
          Why?
"We must achieve the character and acquire the skills to live much poorer than we do. We must waste less. We must do more for ourselves and each other. It is either that or continue merely to think and talk about changes that we are inviting catastrophe to make."
Wendell Berry, from the essay "Word and Flesh," in the book What Are People For? North Point Press, 1990.


Monday, March 22, 2010

Living a Minimalist Life

Less is So Much More: Living a Minimalist Life | Care2 Healthy & Green Living
Not long ago, I discovered a blog called “mnmlist.” I’ve been following Lloyd Alter’s Frugal Green Living series and he has added some interesting quotes from mnmlist creator, Leo Babauta, who also founded Zen Habits. What I really like about mnmlist is how refreshingly clean it is — no ads, no pictures, no clutter.

What is mnmlist about?
  • It’s about minimalism, and why it’s important today.
  • It’s about stuff, and how it has come to overwhelm us. 
  • It’s about distractions and commitments and a neverending task list. 
  • It’s about the culture of more, of bigger, of consumption.
  • It’s about how less is the answer.
That’s it. In the scheme of striving to consume less, edit more and create more of what we need, these ideas strike a chord with me.
 This week, Babauta posted about empowering people to create. Those of you who follow my EcoNesting blog know that I love DIY. Babauta’s post truly resonated with me because it addresses the mindset of moving from “passive consumers to creators.” While I have written extensively about creative DIY projects, I hadn’t really put into words why creating your own stuff can be such a freeing experience.
 Anyway, I thought the mnmlist post was meaningful and I decided to ask Babauta if I could share the post with the Care2 readers. When I searched mnmlist.com for Babauta’s contact info to query him about it, I handily found this statement:
“This blog is Uncopyrighted. Its author, Leo Babauta, has released all claims on copyright and has put all the content of this blog into the public domain. No permission is needed to copy, distribute, or modify the content of this site. Credit is appreciated but not required. Do whatever the hell you like.”
 Wow, I never expected that! You don’t need to know much about writing or publishing to know that everything written online is somebody’s baby. Legally and ethically, you don’t want to mess with that. No copyright. Amazing…
 empower people to create
“We live in a world where we are passive consumers: we see an ad for an iPhone, new car, new clothes; we go to the store or website and buy the item; we use it, and then dispose of it when we’re done.
 What if we could break free from that?
What if we could become creators, participants, sharers, empowerers?
An awesome article about three guys who not only build bamboo bicycles, but show people how to make them themselves, really highlights how this can be done.

These guys are transforming people from passive consumers to creators, builders, knowledgeable users. That’s amazing.

How can you empower people? How can you turn people from consumers into makers? How can you help people from being passive users to knowledgeable ones?
Change the world — it’s waiting for you.”
 Thank you, mnmlist.

Ronnie Citron-Fink is a writer and educator. Ronnie regularly writes about sustainable living for online sites and magazines. Along with being the creator of www.econesting.com, Ronnie has contributed to numerous books about green home design, DIY, children, and humor. Ronnie lives the Hudson Valley of New York with her family.
More on Conscious Consumer (105 articles available)
More from Ronnie Citron-Fink (154 articles available)


Saturday, March 20, 2010

Make An Apron from An Old Pillow Case ~Tutorial

Vintage Pillowcase Apron Tutorial - CLOTHING
Sweet Apron made from a Pillow Case Tutorial

Step 1. Select your pillowcase. I get mine from the thrift store - they're 99 cents each there, and I'm always able to find really nifty ones. If you look at the above photos, you'll notice that at the bottom of the apron there is some type of neat-looking trim. Most of the pillowcases I find have this on them already - at the opening to the case.

Step 2. Cut your fabric


Cut your pillowcase into two parts. The bottom (aka the opening) part will be the apron, so make sure it's approx. the length you desire.


Cut the second piece of the pillowcase (aka the part that is NOT your apron) in half lengthwise.


Take the half that has 3 edges sewn (aka the top of the pillowcase). This will be where your pockets stem from. Cut a piece from this as wide as you'd like your pocket to be.


Match your first cut pocket to the other side of this piece of fabric and cut out your second pocket.


You should now have five pieces.
1) the apron body (not shown)
2 & 3) the pockets
4) the piece of fabric from between your pockets
5) another piece that we haven't dealt with yet.


Fold the piece that remains from between your pockets in half. Cut along the fold line. This will form two pieces which will be sewn as the pocket flaps.


Move to the spare piece of fabric. Cut it in half length-wise.


Cut one end open on each spare piece length. These will become your tie straps.


In total, you should have cut seven pieces from the original pillowcase.
1) Apron body
2 & 3) pockets
4 & 5) pocket flaps (picture on top of pockets)
6 & 7) Tie straps (loooong pieces)

Step 3: I like to sew-it, sew-it!


Turn pocket flaps right side together. Sew edge except the top. Turn right side out. Ready to sew.


Turn the pocket pieces right side together. Sew the edges together (minus a small opening). Pull the pockets right-side out again. They're ready to sew on.


Arrange your pockets and flaps on the apron. Try to keep your kitty OFF the apron.


Sew ties right-side together only on ONE side. Fold over top of apron. Fold raw edges under and pin in place.

Sew ties, on both sides. Sew pocket flap on bottom raw edge (underneath, on side that will not show). Sew pockets on right, bottom, and left edges.

Final touch - I used no-sew snaps - attach snaps to your flaps. Topstitch whatever you'd like to have a decorative finish on.


The finished product!


Wednesday, March 17, 2010

10 Uses for Clothespins | Apartment Therapy Chicago

10 Uses for Clothespins | Apartment Therapy Chicago


10 Uses for Clothespins

12-2-08clothespins.jpg
If you've got a bag of clothespins on hand for line-drying, you can also use them around the house for other odd jobs. Click below for 10 spots around the house where clothespins can double as clips, hangers, and organizers...

  • Hangers for Odds and Ends: Affix a wire to a clothespin, twist it into a hanger, and hang odd items from a closet rod. The versions shown at top are from Plug and Play.


  • Artwork Display: Clipped to a wire, clothespins can hold photos and postcards. The image above shows an Inspiration Display from Gennine's Art Blog.


  • Office Organizer: Martha Stewart's Clothespin Organizer sorts papers over a desk or in a home office.


  • Desktop Clips: These clothespin clips from SusyJack* allow you to sort your papers by the day of the week.


  • Kitchen Clips: Use clothespins to clip pantry bags closed including chips, nuts, pasta, flour and any open dry-goods bags.


  • Clothes Hangers: Kind of an obvious use, but in addition to line-drying, you can clip clothespins to a regular closet hanger to hang skirts and pants.


  • Mitten/Glove Clips: Use clothespins to pin together a pair of mittens or gloves. Hang the clipped pair from a hook to dry when you come in from the snow.


  • Refrigerator Magnets: Hot-glue a magnet to the back of a clothespin, and you've got a memo clip for the refrigerator.


  • Stocking Hangers: Use clothespins on a wire across the mantelpiece to avoid filling the mantle with nail holes.


  • Clip-On Organizing Tags: Check out this organizing project from Ohdeedoh for inspiration.

  • Things to do with shredded paper | Bohemian Revolution

    Things to do with shredded paper | Bohemian Revolution


    Things to do with shredded paper

    by Jen

    150435_shreddedI shred a lot of paper nowadays to protect my identity. This producers bags and bags of trashed paper. Recycling it is one option. There are also a lot of things you can do with it, thus reusing as well as recycling. Also, it saves money.
    • Pack stuff with it. Delicate china, expensive electronics… this stuff beats styrofoam popcorn hands down because you can really pack it into those areas where you’re afraid something will rub, bump or shift. Use it for mailing items (if you’re sending it away, make sure your shredder leaves it in very tiny pieces to protect whatever was on that paper). Use it for packing stuff you’re going to stick in the garage or attic. Seriously – this stuff can move a whole house without anything breaking.
    • Use it as Easter Basket Grass.
    • Add flour and water (equal parts) and you’ve got papier mache for projects.
    • Give it away to a local animal shelter to use as bedding.
    • Use it as bedding for your own pets’ cages (rodents, etc.)
    • Give the kids some glue, some shreds, some watercolors, and some paper, and let them make art.

    Tuesday, March 16, 2010

    Homemade Glue and Paste Recipes


    The following glue and paste recipes use a variety of ingredients and methods. Choose the one that best suits your project. For variety, add food coloring before using. Store all glues and pastes in airtight containers in the refrigerator.
    Glue
    Materials
    • 3/4 cup water
    • 2 tablespoons corn syrup
    • 1 teaspoon white vinegar
    • Small saucepan
    • Small bowl
    • 2 tablespoons cornstarch
    • 3/4 cup cold water
    Directions
    1. Mix water, corn syrup, and vinegar in saucepan.
    2. Bring to a full, rolling boil.
    3. In bowl, mix cornstarch with cold water.
    4. Add this mixture slowly to the hot mixture, stirring constantly until the mixture returns to a boil.
    5. Boil for 1 minute, then remove from heat.
    6. When cooled, pour into another container and let stand overnight before using.
    Homemade Paste
    Materials
    • 1/2 cup flour
    • Cold water
    • Saucepan
    • Food coloring (optional)
    Directions
    1. Add cold water to flour until mixture is as thick as cream.
    2. Simmer and stir in saucepan for 5 minutes.
    3. Add a few drops of food coloring, if desired.
    4. This wet, messy paste takes a while to dry.
    Papier-Mache Paste
    Materials
    • 1 cup water
    • 1/4 cup flour
    • 5 cups lightly boiling water
    • Large saucepan
    Directions
    1. Mix flour into 1 cup water until mixture is thin and runny.
    2. Stir this mixture into lightly boiling water.
    3. Gently boil and stir 2-3 minutes.
    4. Cool before using.
    No-Cook Paste
    Materials
    • Bowl
    • 1/2 cup flour
    • Water
    • Salt
    Directions
    1. In bowl, mix flour with enough water to make a mixture that's gooey, but not runny.
    2. Add a pinch of salt; stir.

    Monday, March 15, 2010

    Why I Broke Up With My Cable Company

    I've never been overly fond of greedy corporations and now I am entirely disgusted with First, Comcast Cable Co. and now with Verizon FIOS. They've been steadily increasing their fees. You can not watch your 2nd or 3rd TV unless you rent a separate box at $5.99 a pop for each additional TV. There's a load of junk channels in addition to other channels that broadcast half hour long infomercials.  I have a HDTV that pulls in all the local channels in HD for free yet while I'm hooked up to cable I have to pay $14.99  for a HD box if I want to receive any HD channels (even the local channels) because they scramble the signal. To Hell with Cable TV. I am canceling my service. My son has been doing this for over a year now and has had no complaints. He a  has Netflix account for $9.00 a month that offers unlimited streaming movies, documentarys  and TV Shows. For his 2nd TV in his bedroom he has a   Roku Box. 
    All you need is Highspeed/broadband internet connection and you can kiss cable goodbye.


    WATCH FREE ONLINE:

    http://www.letmewatchthis.com/

    http://freedocumentaries.org/index.php

    http://www.joost.com/

    http://www.hulu.com/

    http://abc.go.com/

    http://dsc.discovery.com/videos/

    http://www.freetvonline.com/

    http://www.fancast.com

    http://www.tvunetworks.com/

    Free Documentary Films

    http://freedocumentaries.org/index.php


    Free Documentary Films
    At freedocumentaries.org we strongly believe that in order to have a true democracy, there has to be a free flow of easily accessible information. Unfortunately, many important perspectives, opinions, and facts never make it to our televisions or cinemas (you can watch movies in our media category if you want to know why).

    Make Your Own Laundry Detergent


    Visit The Website:   http://www.livingonadime.com/

    Gifts From the Kitchen

    Gifts From the Kitchen - Flavored Oils and Vinegars


    by Martha Matthews

    Flavored vinegars and oils are quite popular theses days. They make a very thoughtful gift for a hostess, for a housewarming, or for Christmas. If you've priced them though, you know that they aren't cheap. You can make your own version of these trendy little items with a few simple ingredients. Here are some recipes to get you started.

    VINEGARS

    Flavored vinegars add an extra kick to marinades, sauces, and dressings. If you are looking for an elegant and thoughtful gift to make for Christmas, try these savory blends that are sure to enhance any meal. If you grow your own herbs, this is a great way to use up any excess before the growing season is over. We hope you enjoy these unique blends.

    Vinegar Base

    1 small bunch of parsley
    1 teaspoon of peppercorns
    1/8 teaspoon of salt
    1 clove of garlic, peeled
    1 quart of your choice of vinegar: cider, white distilled, rice
    wine, white wine, or red wine


    Place the parsley, garlic, salt and pepper in a 2 quart ceramic or glass bowl.

    Bring the vinegar to a boil. Pour the vinegar over the herbal mixture in the bowl.

    Cover and let the mixture stand for two days. Strain the mixture and decant into a sterilized bottle. Add one to three sprigs of the herbs of your choice. Seal the bottle with a cork or lid. Let stand for two more weeks before using.

    Flavor Combinations

    Tarragon and lemon in white wine vinegar Chives, basil, and parsley in white wine vinegar Oregano, rosemary and thyme in red wine vinegar Lemon and dill in cider vinegar Garlic, chives blossoms and chervil in red wine vinegar Cilantro, jalapeño pepper and lime in white distilled vinegar (this one is hot) Lavender blossoms in cider vinegar Ginger root and cilantro in rice wine vinegar.

    OILS

    1 teaspoon peppercorns
    8 to 10 sprigs of your choice of herbs
    Olive oil to fill the container you are using
    1 sterile bottle or wide mouth canning jar


    Place the herbs and peppercorns into the sterile bottle or wide mouth canning jar. Use a funnel to decant the olive oil into the bottle to cover the herbs. Seal and let stand for one month before using.

    Flavor Combinations

    Lemon and dill
    Tarragon and chive
    Lemon and garlic (one of our favorites)
    Garlic, onion, and basil
    Basil and garlic
    Cilantro and Lime
    Rosemary and Marjoram
    Garlic, onion, oregano and red bell pepper


    Note: When using large pieces of fruit or vegetables, cut them into small wedges or pieces to fit into the bottle. Use bamboo skewers to hold the pieces together in the bottle.

    Use herb vinegar in salad dressings, marinades, or to deglaze pans.


    Sell Your Books In Three Easy Steps

    Dishwasher Detergent Recipe

    Dishwasher Detergent Recipe - Make Your Own Dish Detergent


    Ready to trade your over-priced and chemical-laden dishwasher detergent for something better?
    Then, try this simple recipe for homemade detergent:

    What You Need:

    • 1 Tablespoon Borax
    • 1 Tablespoon baking soda

    What You Do:

    Mix the Borax and baking soda together. Then, add to your dishwasher's detergent compartment, and run as usual.

    Why This Works:

    Borax and baking soda are both natural disinfectants and mild abrasives – just what you need to blast away stuck on food and germs. In fact, you may be interested to learn that Borax is a common ingredient in many commercial detergents.

    Benefits of Making Your Own Dishwasher Detergent:

    • inexpensive
    • no harsh chemicals
    • does not emit chlorine gas like other commercial detergents
    • effective sanitizer
    • effective stain remover
    • effective water softener
    • environmentally-friendly (phosphate-free)

    Tips and Warnings:

    1) Borax sells under the name 20 Mule Team, and can be found on the laundry aisle. 2) Save time by making up big batches of dishwasher detergent, consisting of equal parts Borax and baking soda. 3) Keep prepared detergent out of the reach of children and pets.
    Image and video hosting by TinyPic

    Make Your Own Lemon Furniture Polish

    Lemon Slice

    Furniture Polish Recipe I

    INGREDIENTS:

    • White vinegar
    • Lemon juice

    PREPARATION:

    1. Combine equal parts white vinegar and lemon juice in a bowl or spray bottle.

    2. Use a clean cloth to rub a small amount of the polish into your furniture.

    3. Wipe dry with another cloth.

    Furniture Polish Recipe II

    INGREDIENTS:

    • 1 cup olive oil
    • 1/2 cup lemon juice

    PREPARATION:

    1. Combine olive oil and lemon juice in a bowl or spray bottle.

    2. Use a clean cloth to rub a small amount of the polish into your furniture.

    3. Wipe dry with another cloth.

    Benefits of Using Homemade Furniture Polish:

    • inexpensive
    • chemical-free
    • no fragrances to irritate allergies
    • environmentally-friendly

    Tips and Warnings:

    1) Do not reuse spray bottles that have contained other chemicals

    2) Shake before each use to recombine ingredients

    3) Cheap olive oil works just as well as more expensive grades

    4) Smaller batches can be made, if you prefer to use fresh polish each time you dust – just maintain the ratio found in the recipe

    Make Your Own Tooth Paste

    Image and video hosting by TinyPic

    It wasn't until the late 1800s that companies like Colgate began producing commercial toothpastes. Like products of the nineteenth and twentieth century, marketing became the driving force. Additives like fluoride, flavoring, coloring, and foaming agents are now a standard part of the recipe for commercial toothpaste. But you can keep your teeth clean and white and your gums healthy without these additives. Just use the same simple ingredients your great grandmother used for her family's tooth powders and toothpastes.
    Baking Soda and Peroxide

    The easiest solution is to make a paste of baking soda and a few drops of hydrogen peroxide. Not only with this make your teeth and mouth fresh and clean, the peroxide will help to whiten your teeth.

    The other way to make baking soda whitening toothpaste is to mix a teaspoon of baking soda with a teaspoon of hydrogen peroxide, and if you want you can also add peppermint oil or use lemon flavored toothpaste to freshen it up a bit. You can also choose your favorite kind of flavor; after all you are making your own toothpaste! Brush your teeth with this and in a few weeks you will definitely see the results!


    Baking Soda is a natural substance that is used for household cleaning. This substance is often times found in toothpaste for extensive teeth cleaning. If you want to make an excellent toothpaste than baking soda is definitely a must have. Baking soda helps to freshen your breath as well as kill germs.

    Good ‘O Tooth Powder
    2 Tbsp dried lemon or orange rind
    1/4 cup baking soda
    2 Tsp salt

    Place rinds in food processor or blender, grind until peel becomes a fine powder. Add baking soda and salt then process a few seconds more until you have a fine powder. Store in an airtight jar or bottle for best results and lengthened use. Proceed to brush your teeth by dipping moistened toothbrush into mixture, brush as usual.

    Simple Toothpaste
    1 Tsp of the Old Fashioned Tooth Powder
    1/4 Tsp Hydrogen peroxide

    Mix into a paste and brush as usual
    Food for thought (Hydrogen peroxide is an excellent tooth cleaner as well. This resource is used as a teeth whitener in many types of toothpaste.)

    Peppermint Toothpaste
    1 Tsp baking soda,
    1/4 Tsp hydrogen peroxide
    1 drop oil of peppermint

    Mix ingredients together to make a paste, apply to toothbrush by dipping toothbrush into mixture, brush as usual.
    Everyone likes to have fresh breath but not all people enjoy chewing gum or popping a tic tac in their mouth. You will be very surprised at how a quick piece of fruit or vegetable can freshen up

    Breath Fresheners

    Fresh parsley can sweeten up your breath in a jiffy.

    If you chew on fennel seeds and anise seeds your breath will smell much fresher.

    Peppermint or spearmint leaves taste wonderful and they will freshen your breath quickly. You can also drink a delicious cup of peppermint tea. (This is great after dinner)

    Thrifty Recipe: Wartime Cake

    Thrifty recipe

    When workroom habitué Melissa Thomson's grandmother wanted to bake during the Second World War, she used a recipe that Thomson and family still use today. "It's called the wartime cake," Thomson says, "because the use of eggs and milk and butter were rationed during the  World War 2 , so they came up with the creative, science-experiment technique of baking soda and vinegar to make it rise instead of the usual expensive characters like eggs." The wartime cake recipe is still a family favourite.

    Wartime cake:
    Preheat the oven to 350 degrees. In a bowl, mix together one and a half cups of all-purpose flour, one cup of sugar, one-third of a cup of cocoa, one teaspoon of baking soda and half a teaspoon of salt.

    Then, add half a cup of vegetable oil, a cup of cold water, a tablespoon of vanilla and two tablespoons of white vinegar. Mix together until smooth, and then bake in a greased pan for about 30 minutes.

    To prepare an optional sauce to serve with the cake, melt half a pound of bittersweet chocolate, three-quarters of a cup of water or milk and half a tablespoon of vanilla.

    Sunday, March 14, 2010

    Homemade Popcorn Balls


    Popcorn Balls

    3/4 cup light corn syrup
    1/4 cup margarine
    2 teaspoons cold water
    2-1/2 cups confectioner’s sugar
    1 cup marshmallows
    5 quarts popped popcorn

    In a saucepan over medium heat, combine everything except the popcorn. Heat and stir until the mixture comes to a boil. Combine the hot mixture with the popcorn until it’s coated. Grease hands with vegetable shortening or wear plastic gloves and spray with cooking spray, and shape the popcorn into balls. Wrap with cellophane or plastic wrap and store at room temperature. — Denise, Illinois


    Wheatless Tuna Biscuits ~ For Dogs

    Image and video hosting by TinyPic

    Wheatless Tuna Biscuits
    Dog Food Recipe Ingredients:
    • 1 cup yellow cornmeal (I sub with brown rice flour for allergy reasons)
    • 1 cup oatmeal
    • 1/4 tsp. baking powder
    • 1/2 tsp. garlic powder
    • 1 small can tuna in oil , undrained  (we are vegetarians so I  use peanut butter )
    • 1/3 cup water
    Dog Food Recipe Directions:
    Grind oatmeal in processor to make a coarse flour. Set aside in small bowl. In food processor, whirr tuna with the oil, and water then add all the rest of ingredient. Pulse until mixture forms a ball, Pulse to knead for 2-3 minutes. Knead on floured surface till it forms a soft ball of dough. Roll out to a 1/8"-1/4" thickness. Cut into shapes. Bake on lightly greased cookie sheet, at 350 for 20-25 minutes. Cool completely.
    We hope your best friend enjoys this tasty dog food recipe!
    New! Download all these Dog Food Recipes FREE in the Dog Food Recipes Cookbook! You can have these awesome dog recipes on your own computer!


    Freeze herbs in ice cube trays | Frugal Village


    Freeze herbs in ice cube trays

    7 March 2010 5 Comments

    herbs ice cube tray
    photo by suavehouse113

    DEAR SARA: I had to buy fresh parsley for a sauce I recently made. I have a bunch left over. Can I chop it and freeze it? — Lisa, Georgia

    DEAR LISA: Yes, you can freeze parsley. Chop the parsley and place it into an ice cube tray. Top each ice cube tray cubbie with water. You want to use about 1/4 cup water for every cup of parsley. You can process this in a food processor, too. Once frozen, transfer herb cubes to storage bags.

    Freeze herbs in ice cube trays | Frugal Village

    Read, Recycle, Release with BookCrossing!

    http://www.bookcrossing.com/

    Read, Recycle, Release with BookCrossing!

    Welcome Welcome back to BookCrossing, where books have adventures of their own. BookCrossing is earth-friendly, and gives you a way to share your books, clear your shelves, and conserve precious resources at the same time. Through our own unique method of recycling reads, BookCrossers give life to books. BookCrossing books are not stagnant dust collectors, but living entities travelling the world as true BookCrossing emissaries. Our books find new readers and introduce them to the wonders of BookCrossing.
    So what are you waiting for? Help make the world a library and recycle at the same time, through BookCrossing!
    Visit The Web Site: http://www.bookcrossing.com/
    If you're not sure of the drill, here's a quick refresher course.

    Friday, March 12, 2010

    Diaper Wipes Recipes

    Cloth Diaper Wipes Recipes and Solutions
    Even though my baby's are all grown now I thought I'd post this anyway, besides I baby wipes, I use them to freshen up through out the course of the day.
    •  2 tablespoons baby shampoo or wash
    • 2 tablespoons oil (food grade cooking oil - not baby oil or mineral oil )
    • 2 cups distilled water


    Mix in a jar and then pour over wipes. Store extra solution in the fridge.


    Aloe Vera Wipes Recipe
    • 2 cups hot water
    • 1/4 cup Aloe Vera Gel
    •  2 drops Tea Tree Oil


    Allow ingredients to cool.


    Mix in a jar and then pour over wipes. Store extra solution in the fridge.


    Anti-Fungal Baby Wipes


    •  1 cup water
    • 1 tablespoon vinegar
    •  1/4 cup Aloe Vera Gel
    • 1 tablespoon Calendula Oil
    • 2 drops Lavender or Chamomile Oil
    • 2 drops Tea Tree Oil or Grape Seed Extract


    Mix in a jar and then pour over wipes. Store extra solution in the fridge.


    This one is great for discouraging yeast diaper rashes because the vinegar and essential oils discourage yeast growth.


    Essentially Oils Recipe


    * 3 T jojoba oil
    • 1tsp tea tree oil
    •  1tsp chamomile oil
    • 1tsp lavender oil
    •  1tsp germanium oil
    • 3/4 cup witch hazel


    Mix in a spray bottle and spray wipes. Store extra solution in the fridge.


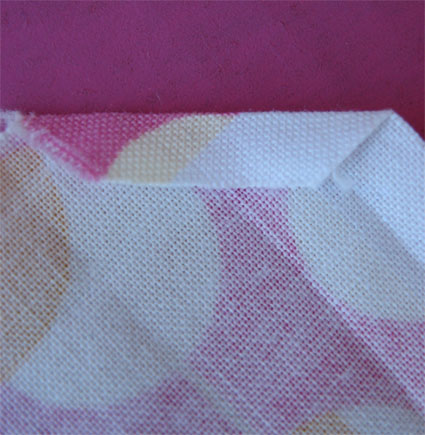
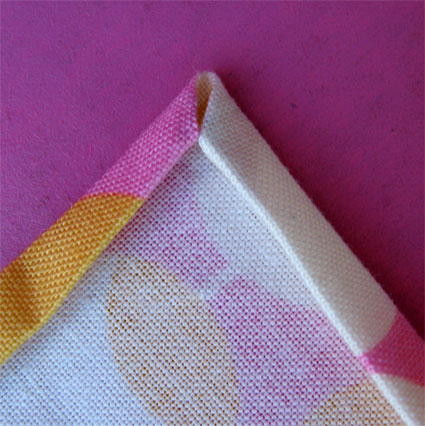
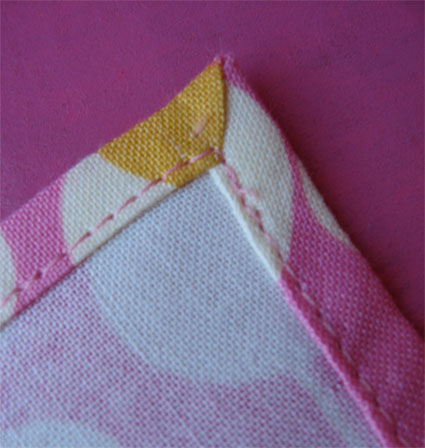
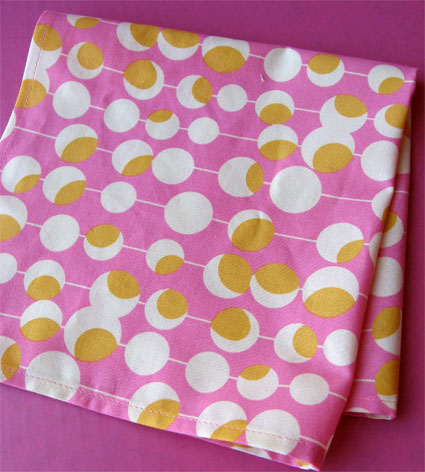
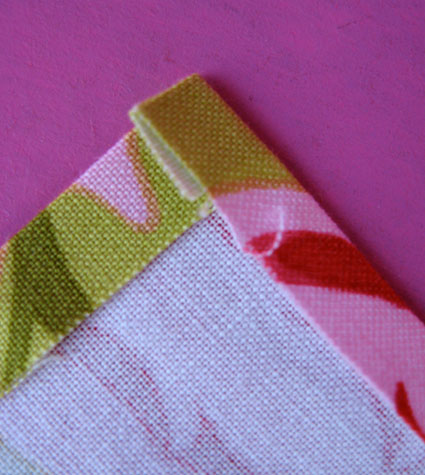
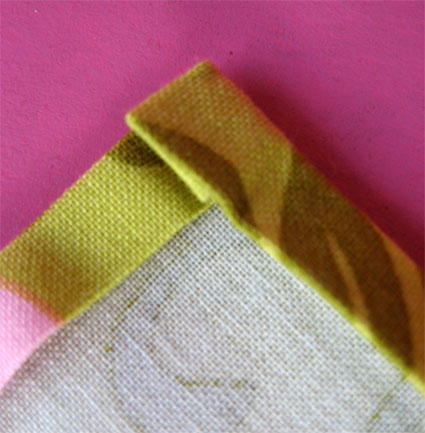
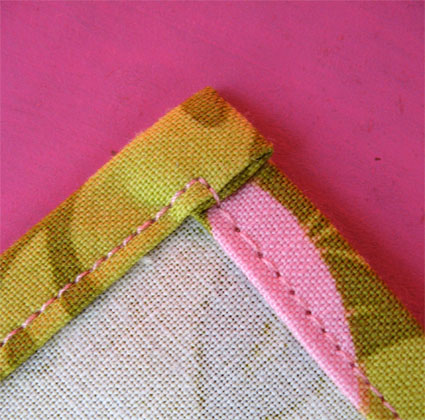
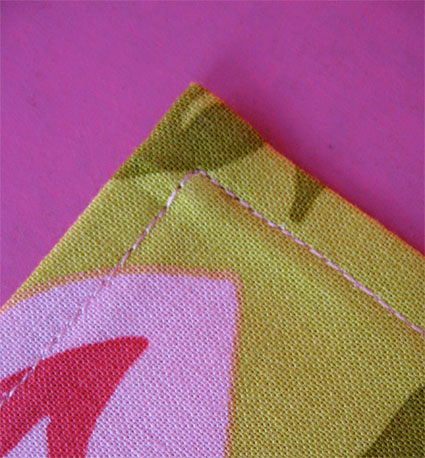
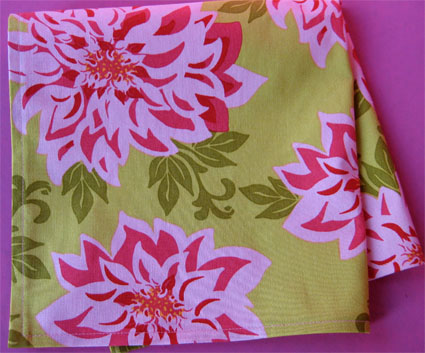
    Make your own cloth napkins

    Make your own cloth napkins « Skip To My Lou

    posted by cindylouh on April 20th, 2009  


    Tuesday, March 9, 2010

    Make Your Own Topsy Turvy Planter With These Simple Techniques

    Make Your Own Topsy Turvy Planter in a Plastic Bucket | As Seen on TV|As Seen on TV Product Reviews

    Make your own Topsy Turvy Planter with these simple suggestions. I know many of you are looking for info on how to make your own Topsy Turvy Planter. I just came across some more how-to videos on eHow.com. Yolanda Vanveen has some suggestions on which tomato plants to choose for your Topsy Turvy, how to grow them in a plastic bucket and also how to prune your plants once they start growing.  You might  also be interested in a review of the Topsy Turvy Planter which includes how to make a Topsy Turvy fiber basket.

    Video 1 - How to Get Started With Your Home Made Topsy Turvy Planter

    Tomatoes as well as other vegetables such as bell peppers, hot peppers, egg plants, zucchini and herbs can be grown in upside down in hanging baskets. If you’re growing tomatoes, Yolanda suggests using a small variety of tomatoes for your planter, to prevent the mature tomatoes from falling off with all the weight.

    Video 2 - How to Grow Tomatoes Upside-Down in a Plastic Bucket

    Many gardeners seem to be using a plastic bucket for their upside down tomato planter. I personally don’t see why plastic buckets are better than the fiber ones. They look extremely heavy! Yolanda suggests starting the plants in a seed tray until there is a good root mass. Only then should you transplant them to a bucket. You can also grow tomatoes either out of the bottom or side of a bucket.
    Here’s also a link to a step by step process along with some pictures.

    Video 3 - How to Prune Your Upside Down Tomato Plants

    Yolanda mentions that is a good idea to prune your plants to help the main stems grow sturdier and thicker. This prevent stems from snapping off especially after the tomatoes start growing and adding more weight.
    Make your own Topsy Turvy planter with either a fiber basket or plastic container. It sure looks like you’d need a lot of dirt with the plastic container, which is why I’d prefer the fiber basket. Also you wouldn’t have to water as often. I guess it’s you’re own preference.


    Monday, March 8, 2010

    Earth Day Craft-- T-Shirt Weaving

    Alpha Mom™ - Baby, Pregnancy, Toddler, Motherhood, Baby Names, and Baby Product Reviews

    T-Shirt Weaving


    by Ellen Luckett Baker
    t-shirt-weaving.jpg
    Earth Day is April 22, so help your kids celebrate with an upcycled weaving project using old t-shirts. My six-year-old was fascinated to watch me cut up clothing (not for the first time) and we thought of many more uses for these cast-off shirts. I'm certain that you have some old t-shirts lying around the house, but if you get them at the thrift store, look for extra large shirts with no seams on the sides to make the longest strips. We used string for the base (called warp strings) because I found it easier for little hands to work with, but you could also use more t-shirt strips, creating a denser weave and a fully recycled project. And if you don't have a loom, don't go buy one -- you can use a cardboard box by following the instructions here.
    woven-pillow.jpg
    You can make all kinds of things with your weaving. I sewed this one into a little pillow filled with rice and essential oils to be warmed in the microwave for soothing tired eyes. I'm thinking this will make a nice Mother's Day gift. You can turn your weaving into a dollhouse rug, wall hanging, hot pad, or any number of things. With a little sewing, you can make a fragrant sachet or a pouch to hold eyeglasses, cell phone or camera.
    Supplies:
    -peg loom
    -old t-shirts
    -string (optional)
    -masking tape

    weaving%20step-1.jpg
    weaving%20step-2.jpg
    weaving%20step-3.jpg
    weaving%20step-4.jpg
    weaving%20step-5.jpg
    weaving%20step-6.jpg
    weaving%20step-7.jpg

    All done! You can tuck in the knots on the sides to make your weaving look neater, but since we were sewing ours, we didn't bother with this step. I'm going to make some of these on my own to use as dishcloths.